Introduction
The Epson Stylus Pro 3880 (and the 3800 before it) has been one of the best and most popular printers for making high quality digital negatives for contact printing using various alternative photographic printing processes. However, it has one potential drawback which is that the star-wheels on the eject path of the paper transport mechanism can leave a trail of pin-prick dots on the printed surface of the negative, or any glossy surface. One way of avoiding this is to use the Manual Front Feed mechanism which does not engage the star-wheels. The problem with this is that the Front Feed is designed for very thick materials like poster board, and doesn’t always handle thinner materials well. I have 2 3880s; on one of them the Front Feed works perfectly with the Pictorico Ultra Premium OHP transparency film that I use for digital negatives, but in the other it doesn’t.
Here is a way to disable the star-wheels without having to make any permanent modifications to the printer. We take advantage of the retracted position of the star-wheel mechanism when the Front Feed is in use by tricking the printer into thinking that the Front Feed is closed even though it is in the open position.
Step By Step
- Open the Paper Eject Tray Cover and the Front Feed Tray.
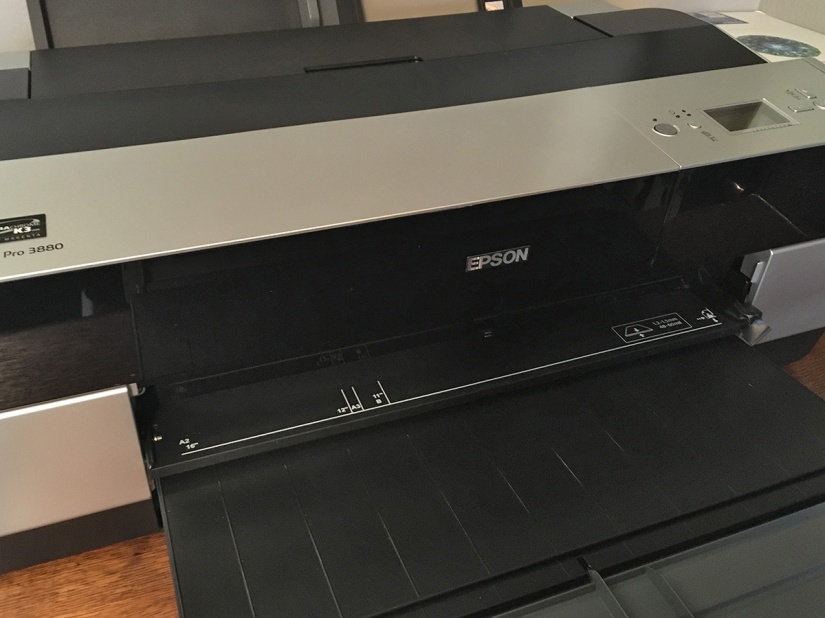
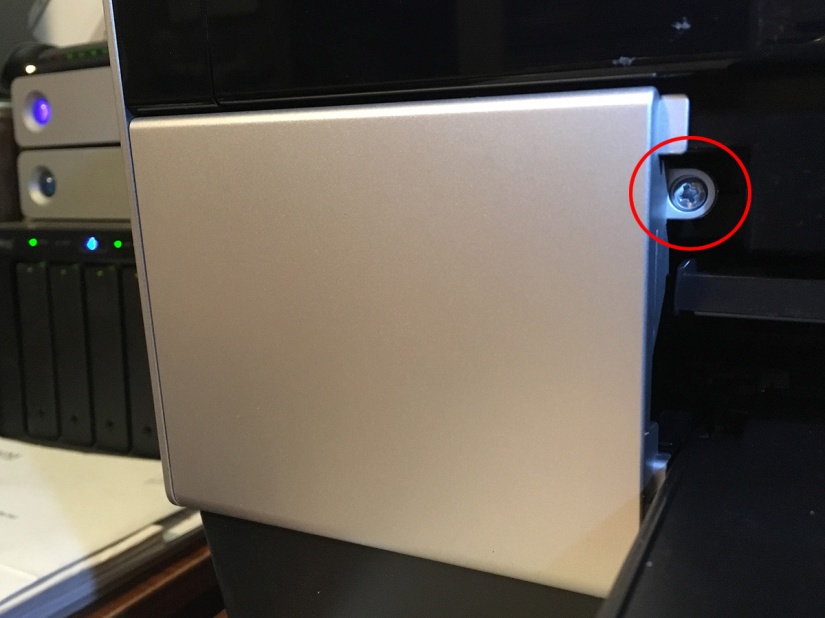
- On the left side you will see the Front Left Housing Cover which is secured by one screw at the upper right. Remove the screw, tilt the cover towards you from the top, and remove it.
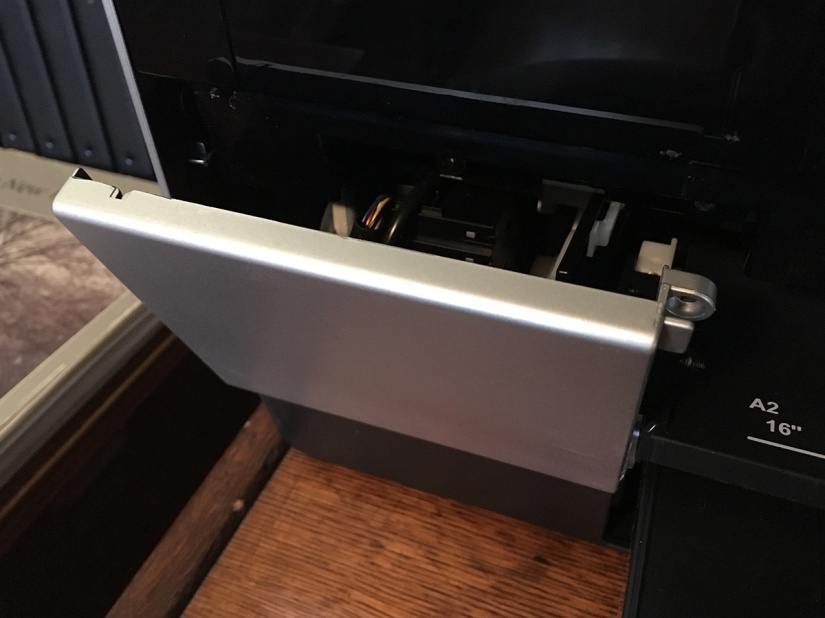
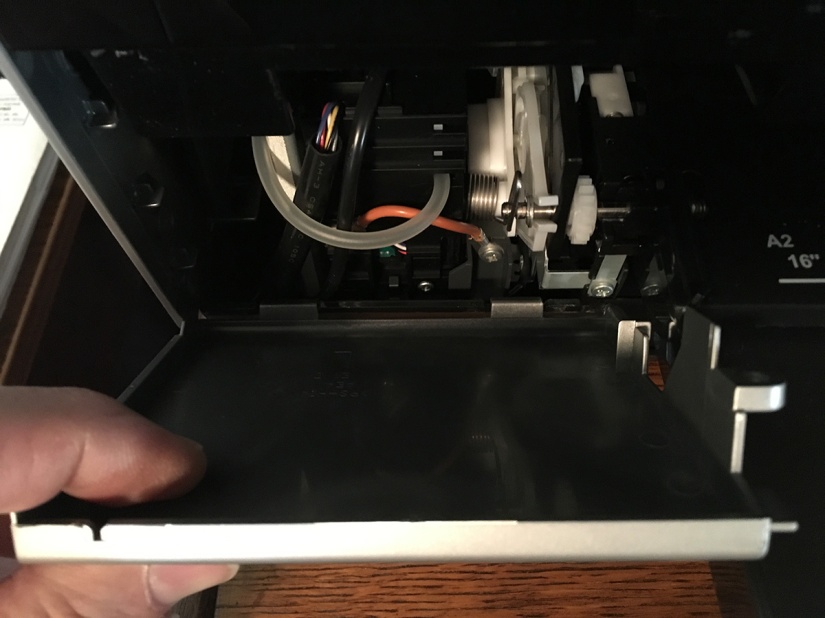
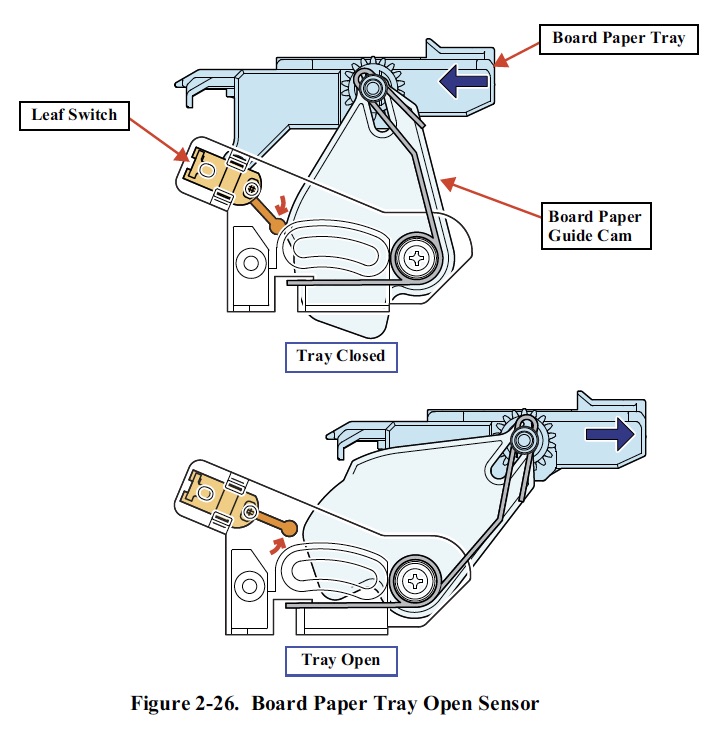
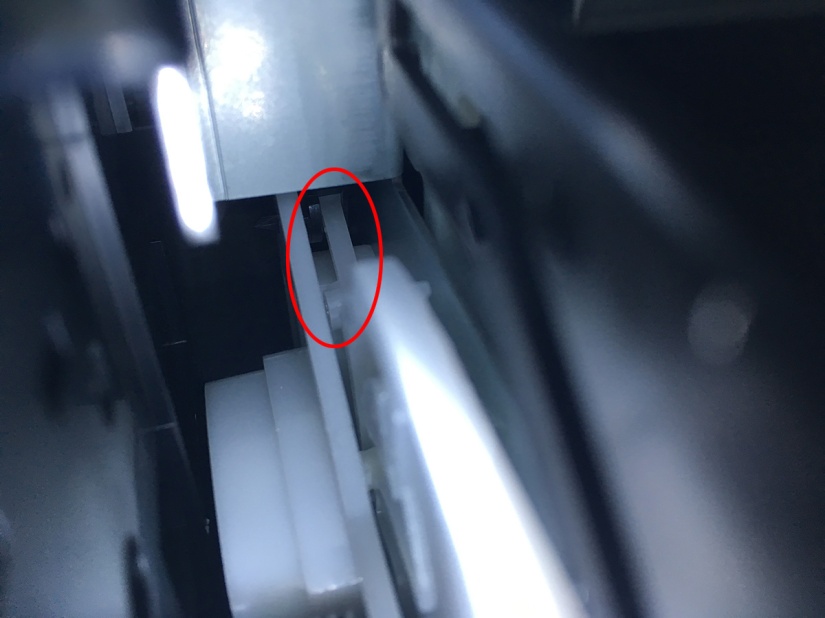
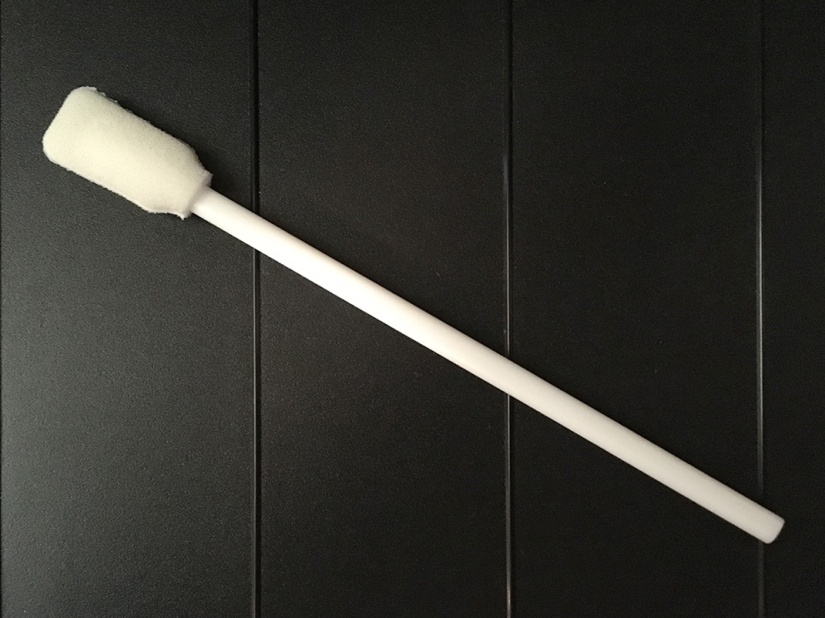
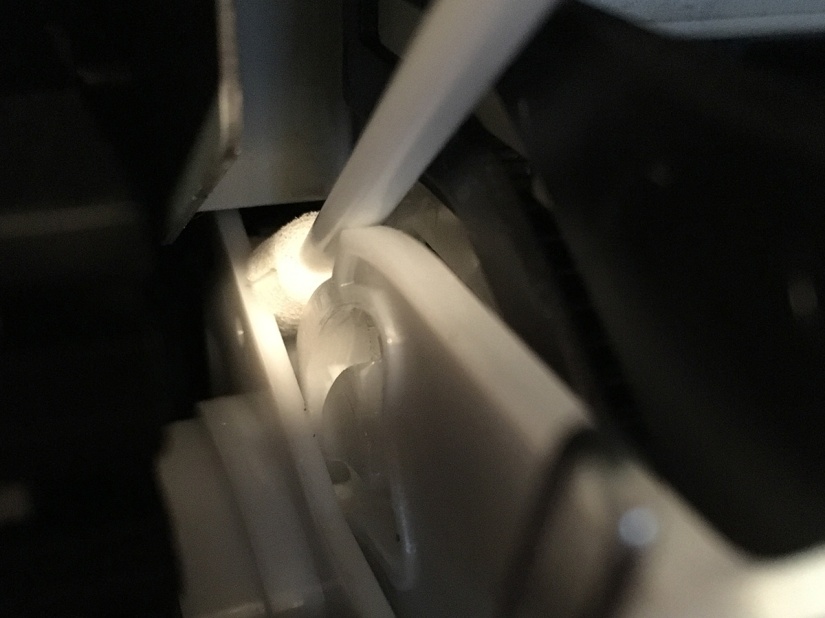
- There is a Leaf Switch behind the large white plastic cam near the right side of the opening. When the tray is closed the cam lifts it. It is small and well hidden, and a bit tricky to see at first. What we need to do here is to hold it in the closed position so that the printer thinks the Front Feed is closed even though it is not. That way we can use the Manual Rear Feed or even the Auto Feed but the star-wheels will not be lowered. I used a Printer Cleaning Swab from InkjetMall.com which I happened to have on hand to push the switch lever down just far enough that it is in the closed position while the tray actually remains open. The business end of the swab is wide enough to stay in place by friction without being taped. The panel display will no longer indicate that the Front Feed is open.
- Now locate the guide tab on the front right corner of the Front Feed Tray. Using a piece of electrical tape or similar flexible tape, cover the tab in such a way as to create a ramp that exiting film or paper can slide over.
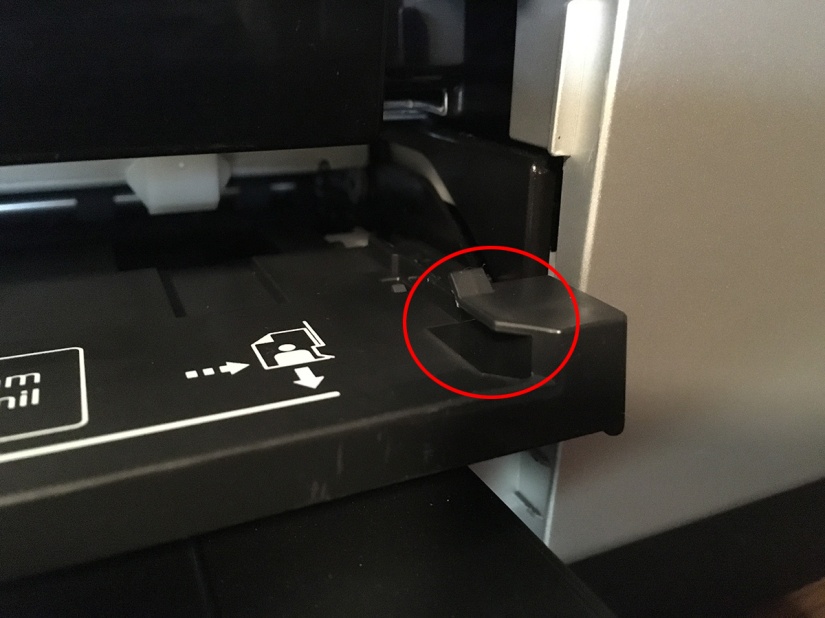
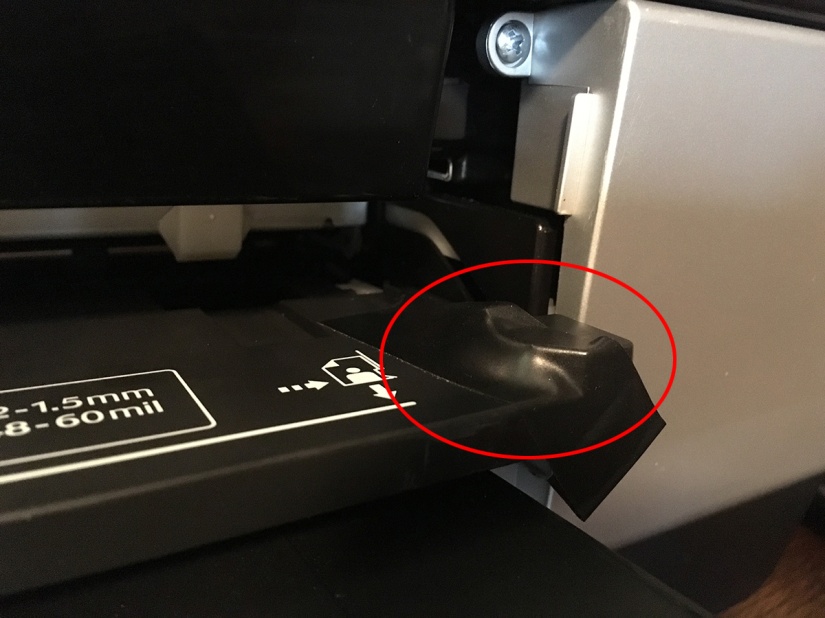
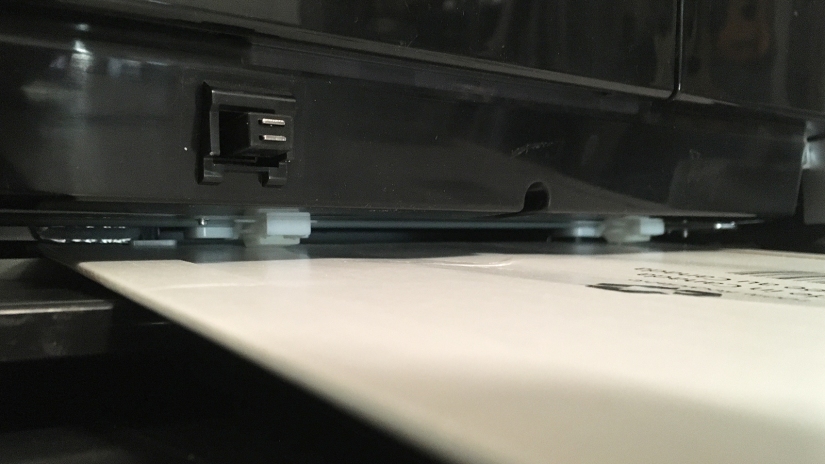
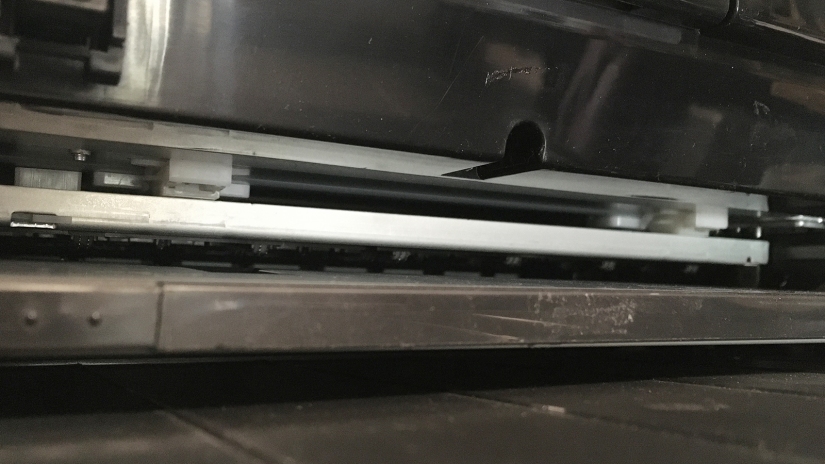
- Finally, take a strip of film or smooth paper the width of the eject tray opening (17 inches) by 3-4 inches and place it so that it acts as a bridge to prevent the exiting film from sliding below the Front Feed Tray which is left in the open position. The piece I used here came from a roll so it has a slight downward curl. It’s not really necessary to tape it in place.
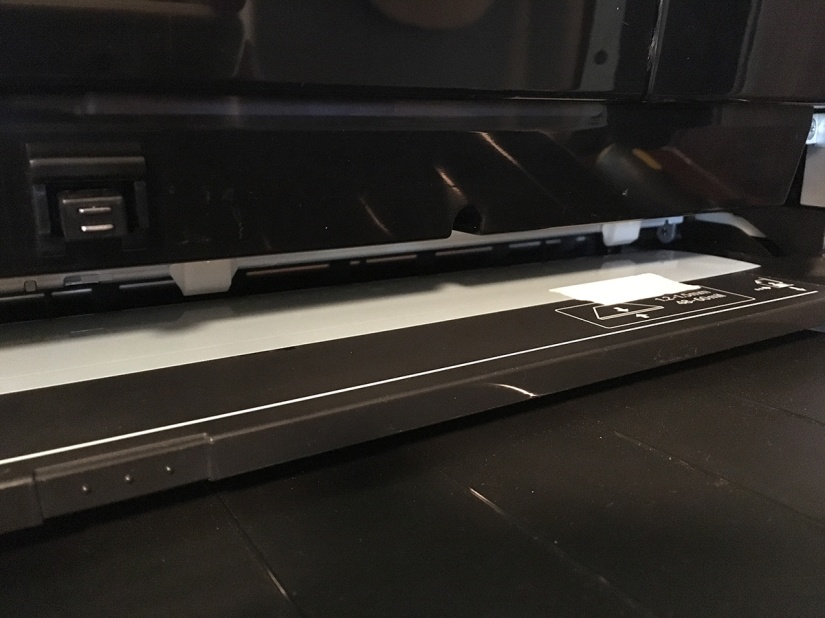
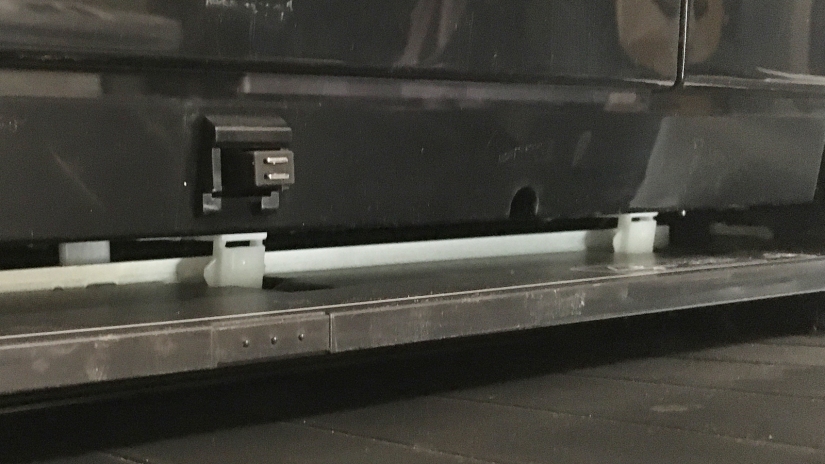
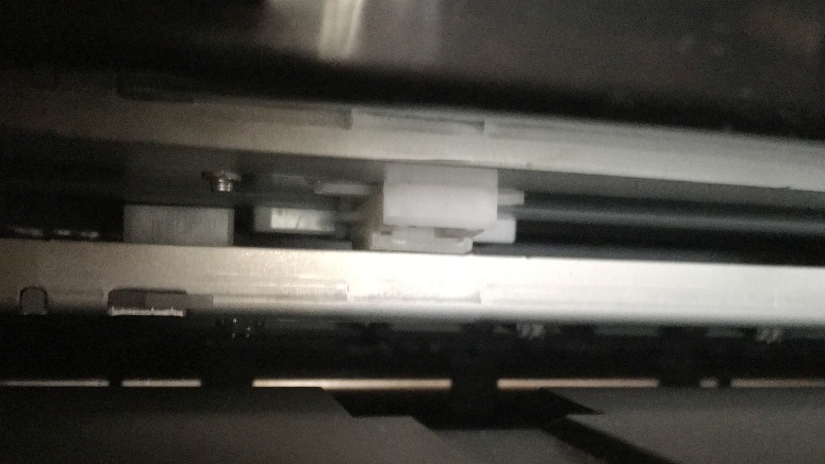
- Optional: The 2 little white hinged flaps that are visible in the preceding picture shouldn’t be a problem unless your film curls up too much. If it does, you can push the metal frame that is just behind them in a bit, push the white plastic pieces in and up with a piece of cardboard wide enough to push both flaps up together, and then let the frame back out. It’s really easy.
Conclusion
The only drawback to this procedure that I can see is a very minor one. You won’t be able to close the Front Feed and the Eject Tray if it is to be left set up this way, and you’ll have to leave the Left Front Cover off. On the other hand, there is no reason that I can see why it can’t be used this way for printing on paper too, so why not just leave it as is. Alternatively, remove the swab from step 3 and the film bridge from step 5, and close the Front Feed Tray.
This modification does affect how much margin you need on the trailing edge. Since the star-wheels passively (by which I mean they are not motor driven, contact with the paper/film makes is what turns them) help keep the paper/film tracking straight, circumventing them limits the ability of the transport mechanism to to keep it moving properly as it runs out of material. A 1.5 inch margin is no problem; a 1 inch margin skewed before finishing; so it’s somewhere in there. I’m going to stick with and an inch and a half.
That guide tab on the right corner of the Front Feed Tray is a real nuisance since it pushes the front feed path about 1/4 inch to the left of the rear/auto feed path. When film goes over it, as it does with this modification, there is a chance that it may curl upward from the right edge which may cause a problem with the head brushing the surface of the film. It seems that having the strip of film in there helps, and that flipping the flaps up is a good idea, since if the film curls upward along the leading edge it may get caught on them.
I haven’t tried the auto-feed, but I don’t see why it wouldn’t work. I just never have used it much.
It is also possible that this procedure will work on the P800.
Acknowledgements
I wish I could say that I came up with this modification from my own ingenuity, however that is not the case. Many thanks to Walker Blackwell of Inkjetmall for giving me the clues I needed to figure it out. I’m glad to be able to help out by writing up these instructions.


Thanks so much for posting up such detailed instructions. I’ve had this as a nuisance, and sometimes more than a nuisance issue, with my negatives for carbon printing for a few years.
This is GREAT GENIUS idea!!! I very appriciate for you. I had to buy another large format printer
that have a vacuum system not pizza wheels.
Though I look around the way to solve this annoy pizza wheels issue, I could not found the answer.
but finally I have found this rock gem! Thank you.
A much simpler solution, at least on our 4880C: The pinwheels can be easily flipped up with one finger. Load the substrate, in this case Fixxons, and prepare to print. As soon as you hit the final print button, wait for the pinwheels to engage then simply firmly use your index finger to push them backwards and they will flip up and out of sight.
Note the C means made in China. We are in Hong Kong
Unfortunately for 3880 users, the mechanism is different than that of the 4880. What I have described really is the simplest way for the 3880, 3800, and probably the P800 as well.
I’m not so sure this procedure works on the P800.
I’m not in front of my printer right now but I remember reading these instructions a few months ago while in my studio and these directions didn’t seem to apply.
Hi Phil – Are you referring to to my procedure or to Robin’s?
Yours. I haven’t looked at the P800 with Robin’s advice in mind.
My feeling, though, is that the P800 has more in common with the 3880 than the 4880 series.
The mechanism on the 4xxx printers is very different than that of the 38xx series so I doubt Robin’s suggestion would apply to the P800 either.
I haven’t seen a P800 in person yet, but from what I can tell from specs and pictures, it does look like the front feed mechanism is similar if not the same. It also looks like there is a similar left front cover that may house a cam like the one on the 3880. Is there not a visible screw that holds that cover in place? I was just looking at this: https://youtu.be/jJvjbcYYzvc
and notice that the front feed moves the paper up onto the sheet-feed rather that out thru the back, so maybe there is no mode that feeds paper during printing without star-wheels.
Now that I’m back in front of the machine I can see where I got stumped months ago: There is a left lower cover, as with the 3880, but there is not screw to remove it (nor a clear way to remove it without damaging a pin, clasp, tab… or whatever holds it on).
On the 3880, it is the front-feed being open that disengages the star-wheels. In order to keep them disengaged when feeding the film via rear-manual or sheet-feed paths, we have to trick it into thinking that the front-feed is being used. That is the purpose of the swab engaging the leaf-switch behind the cam.
From browsing the P800 user guide, it looks like the feed mode that uses the front-feed in the open position for printing (not just for loading) is the Poster Board mode (p.28-29). This leads me to think that the mechanism is similar to the 3880, and that in this mode the star-wheels are not engaged.
So if you want to pursue this, you need to figure out how to remove the left lower cover without damaging it. There is a Service Manual for the P800 available (for a fee) at this link: http://www.2manuals.com/product_info.php?products_id=1706
So as not to clutter up the comments section of this post I’ll just get back to you once I’ve either succeeded or failed, as my results may be of some use to other P800 users.
I will say, though, that I did manage to (non-destructively) remove the lower left panel.
Time for a beer. Removing that little cover plate may seem like a small accomplishment but today I feel the need to reward myself.
This remedy is a life saver and far easier than other “solutions” I’ve found, thank you!
I’ve successfully disabled the star wheels on my 3880 but now I need to adjust the print to give me the 1.5 inch border at the bottom so I don’t have ink spray and skew issues. I’m printing digital negatives with PiezoDN and QTR, and even if I shrink my image size on the film, it still wants to print the black border all the way to the bottom of the sheet. I’m still new at this, when printing a negative through QTR, can you explain how to add the margin of 1.5″ at the end of the sheet?
I posted this reply along with a couple of examples to your question on the PiezoDN forum. Since PiezoDN works with a positive image, it is a bit different than methods where you send an inverted (negative) image to the printer.
First thing is that if you are trying to print a black border around the image to mask the edges (a white border around the positive image), you have to think of it as part of the image area. You still need to add black to the edge of the page to prevent the printer from trying to fill the rest of the sheet with black ink. I know this seems strange, but QTR sees the area between the image dimensions and the page size as white (on the positive) and therefore wants to print black in that area on a PiezoDN negative. The way to avoid this is to expand the canvas size to fill the area around the positive image with black to the exact same size as the sheet of film you are printing it on.
The target files are NOT ready print as is. The canvas size MUST be expanded (with the extension color set to black) to the exact same size as your film. That is the only way to prevent the printer from printing in what should be the clear margin.
The left and right margins can be anything more than 1/4″ (maybe even less – but QTR can’t print borderless), but necessary leading and trailing margins vary somewhat depending on the printer model. On the 3880 with star-wheels disabled, I have found that it needs 1/2 inch on the top margin and 1-1/2 inch on the bottom. To accomplish this the canvas MUST have black in those areas. If your image is too large to allow that you will have to either reduce the image size or print on a larger sheet.
As an example, most of my current work is 7×17 inch image size. I can print these on 13×19 film by expanding the canvas size (with black fill) first to 13×18 centered which gives a 1/2 inch black border on the short ends, followed by 13×19 anchored on the left which adds another inch to the righthand side. I could of course place it higher or lower if I want by expanding in increments and using whatever anchor selection I need. If I really need the image to be centered on the film I would have to use a larger sheet.
Thank you so much! It sounds so obvious now I’m embarrassed it didn’t occur to me to try it that way. Worked perfectly 🙂
Hi Philip Bond,
I was wondering if you were successful at removing or disengaging the star wheels for the p800?
Thanks, Stacey
Could you do it to the Epson p800?
Yes, it can be done on the P800, but the panel that must be removed is apparently held in place by hidden clips. I don’t have a P800 and have never even seen one in person, so I can’t help with the details, but see Phil Bond’s comments about it below.
Hi, I have this issue on my P800, but it happens even when I use the front fine art tray. Since this fix makes the printer think it’s using the front tray, will it solve my issue considering I have pizza wheel marks using the front tray as well?
Unless you are trying to print on something very thick like 8-ply matboard I just can’t see how it is physically possible that the marks you are getting could be caused by the star-wheels since the wheels are about 1/4 inch above the paper paper path when they are disengaged. You didn’t say what you are printing on, but the marks you are getting must be caused by something else.
It first started happening on Moab Juniper Baryta, but now I’m getting it pretty much on anything that is not matte paper, including Epson luster and glossy papers. When I watch the paper come out of my P800 after loading it in the front tray it is right up against the star wheels, not lowered at all. Maybe it’s different from the 3880? I’ve read a number of people’s posts on the internet saying they also still get the marks when they load using the front tray as well. The marks are exactly spaced like the star wheels, and have the exact same pattern. A double line that lines up with the front double star wheels, and then a single lines that lines up exactly with the back single star wheels.
Well that certainly sounds like star-wheel marks. Looking into the “mouth” of the printer, when releasing the front-feed tray you should be able to see it move forward and up to a point where the star-wheels are no longer in contact with the rubber feed rollers, in fact they are a good distance away. When you push the front feed tray back to the normal position you should then see the star-wheels touching the rubber feed rollers. This is on my 3880. I have never actually seen a P800 in person, but I’m not aware that the feed mechanism was changed. As always, I could be mistaken.
Yes, when I open the front tray I see the star wheels move forward and up, and when I push it in they go back to touching the rubber feed rollers, which sounds like the 3880 feed mechanism that you described. But the paper, once the tray is pushed in and the paper gets loaded further back, runs right along the star wheels, between them and the rubber as it comes out, just like it does with the top sheet feeder. Will this procedure that you explain make the star wheels stay up and forward always? I should probably just try it at this point, I’m just afraid of taking things apart and voiding the warranty or breaking something.
Why are you pushing the tray back in? The tray should stay out when using the front feed normally, and also when using it as described here.
Um that might be a 3880 thing? My P800 will not print until it’s pushed back in. On the screen after it “loads” the paper it asks you to push the tray in, and then it will let you print. It’s also what it says to do when loading thick media in the user guide.
Things just get curiouser and curiouser! As I’ve already mentioned, I don’t have a P800 and have never seen one in person, but I just downloaded the manual and see that what you said about pushing the tray back in before printing is true. This is definitely different than how it works on the 3880. I’ll check with a couple of friends who I think have used this method on P800s and get back to you as soon as I have something to report.
Thank you!
I’m not sure about this, but I think that if you remove the left front cover to gain access to the cams and sensors (as shown in steps 2 and 3) and trick the sensor as shown so that the printer doesn’t know that the tray is open, you will be able to print from the sheet-feed or rear-feed with the star-wheel frame in the lifted position. If you do this, don’t forget to make the little bridge that guides the paper over the back edge of the front-feed tray, other wise it will create a massive mess if it hits the tray. Please understand that this method was devised specifically for printing on film (such as Pictorico OHP) which can be fed via the sheet- or rear-feed of the 3880. I know the P800 doesn’t have the same rear-feed as the 3880, but I’ve been told that the slot that the roll-feed uses can be used that way.
But there may be a simpler way for you to overcome the star-wheel marks on paper. In the Advanced Media Control section of the Epson driver, you can adjust the drying time per print head pass from the default setting of 0 up to half a second in 0.1 second increments. I think you can also do this by creating a custom media type from the control panel.
Ohh I see. So this would allow me to print with the front tray open? I see. Unfortunately I’m out of town right now so I’ll have to wait until next week until I can try it. I’m extremely close to buying a Canon Pro 1000 and just forgetting this mess, as I’m pretty unhappy with Epson’s inability to solve the issue. (They sent me a new printer and it does the same thing). I’ve tried the drying time at max and still same issue. I’ll keep you posted on if your suggestion works and what I decide to do. Thanks for all your help.
Update: Was never able to fix it, bought a Canon Pro-1000 and so far so good!
Has anyone successfully done this on a P800? I recently opened the front cover of mine and it seems almost impossible to get something down there to hold the switch in place. Thought I’d check to see if someone else had done it before I start jamming things into the printer. Thanks!
Hello,
Greeting from Portugal!
I cannot quite understand how to do the step number 6.
Can I remove the hinged flaps?
Or how is it possible to let the metal frame back out?
Hope to hear some guidance
Thanks
Henrique
Olá Henrique,
I just updated the article with 4 pictures that might help answer your questions about step 6.
The first picture shows the flaps in the normal down position with the front-feed tray out. In the second picture I am pushing the tray back about 1cm which is enough to be able to use a piece of cardboard to hold the flaps in the up position while letting the tray slide back out to its fully open position. (It is spring loaded so you don’t have to do anything but release it.) The third picture shows the flaps up and the frame out, ready to print. The fourth is a close up of one of the flaps in the up position.
I can’t find any reference to those little flaps or even a picture that shows them in either the Service Manual or the Field Repair Guide, so I still don’t know what their purpose is. I suppose you could try to remove them, but why make a permanent modification when it is so easy to simply push them out of the way as I have shown.
Hope this helps,
Keith